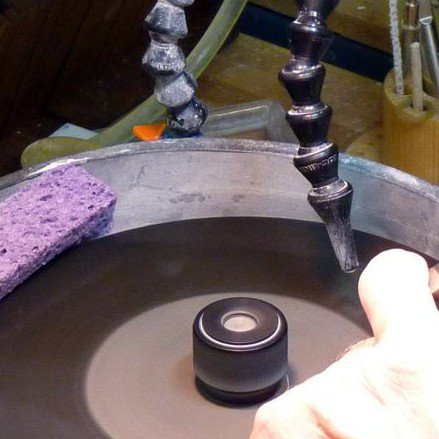
When it comes to stone polishing, one term you'll hear a lot is "grit." Understanding grit is crucial for achieving that shiny, professional finish you want. So, what exactly is grit? Think of it as the texture of the polishing pad or stone – it’s like the sandpaper of the stone world. The higher the grit number, the finer the texture. Lower numbers mean coarser surfaces, which can help remove scratches or old finishes more aggressively.
Let’s break it down further. If you’re just starting out, you might begin with a lower grit, like 60 or 80, to tackle rough areas or damage. As you work your way up to higher grit levels—such as 200, 400, or even higher—you’ll notice the finish becoming smoother and shinier. Each step in the grit progression is essential, as skipping steps can lead to less-than-perfect results.
So, why is Understanding Grit: The Key to Successful Stone Polishing? It allows you to choose the right tools for your specific project. If you’re polishing granite, for instance, you'll want a different grit progression than if you’re working with softer stones like marble or limestone. Knowing your materials and their needs will make the whole process much more enjoyable and effective.
Finally, remember that patience is key! Polishing stone isn’t a race; it’s all about taking your time with each grit level. Pay attention to how the finish looks and feels as you progress through the grits, and enjoy the transformation of your stones as they go from dull to dazzling!
Choosing the Right Grit for Your Project
When it comes to stone polishing, one of the most important things you need to consider is the grit. Understanding grit is where a lot of folks find themselves scratching their heads. So, let's break it down simply. Essentially, grit refers to the size of the abrasive particles on your polishing pads or papers. The lower the grit number, the coarser the surface, and as you move up in numbers, the smoother it becomes.
For starting off your project, you'll typically want a lower grit to get rid of rough spots on the stone. Think of 60 to 100 grit for heavy-duty work. This grit level is your go-to for shaping and removing any imperfections. Once you’re past that stage, it’s time to move up to a medium grit of around 200 to 400. This stage is all about smoothing things out and getting closer to that shiny finish.
Now, if you're after that mirror-like shine, it’s time to get really granular! Grit levels of 800 and above are perfect for the final polish. These higher grits will help you achieve that sleek, shiny surface we all love in polished stone. Remember, patience is key here—taking your time with each grit level makes a huge difference in the end result.
To make your selection easier, here’s a quick breakdown:
So, remember that understanding grit is the key to successful stone polishing! Choose wisely, and you'll be well on your way to achieving fantastic results.
Tips for Effective Stone Polishing
Polishing stones can be an incredibly satisfying hobby, but it can also feel a bit daunting if you're just starting out. One of the first keys to effective stone polishing is Understanding Grit: The Key to Successful Stone Polishing. The grit of your polishing materials really matters, so let’s break it down.
When you’re polishing stones, you'll typically use different grits for various stages of the process:
Another pro tip is to keep your stones wet during polishing. Water helps to wash away the dust and debris, preventing scratches and giving a smoother finish. A simple spray bottle can do the trick!
Don't forget to clean your polishing pads regularly too. It’s easy for them to pick up residue from the stones you’ve polished, which can affect the results of your next project. Just wash them with soap and water, and they’ll be good as new!
Troubleshooting Common Polishing Issues
Polishing stones can seem straightforward, but sometimes things don’t go as planned. If you're facing issues during your polishing process, you're definitely not alone. Let's dive into some common polishing problems and how to fix them, keeping in mind that Understanding Grit: The Key to Successful Stone Polishing can make all the difference.
Cloudy Finish: If your stones are turning out cloudy, it might be due to using too coarse a grit or not rinsing properly. Make sure to change your water regularly and move up to a finer grit gradually. This allows for a smoother finish and helps reduce that haze.
Uneven Polishing: Is your stone looking patchy? This could be a sign that you’re applying uneven pressure or spending too little time on certain areas. Try to focus on consistent, gentle pressure across the entire surface. Rotating your stone while polishing can also help achieve a more even outcome.
Scratch Marks: Finding scratches after polishing can be frustrating. These often come from using a grit that's too coarse for the stone you're working on. Ensure you're starting with the appropriate grit level for your specific stone type. If scratches are persistent, don’t hesitate to backtrack and use a finer grit to smooth everything out.
Excess Dust: Dust flying everywhere can be annoying and messy. This usually happens when the polishing pad is too dry or the grit isn’t suitable for the material. Always keep your pad slightly damp and be sure you’re using the right grit for the stone to minimize dust and keep your workspace clean.
